
Are you looking to improve the code quality of your software development projects? Test-Driven Development (TDD) is a proven approach that can help you achieve this goal. In this step-by-step guide, I will walk you through the process of implementing TDD in your projects, from creating basic tests to continuous code refactoring. Let’s dive in!
Why do I do TDD?
As mentioned in my last article, TDD helps me to ensure the code quality and that all requirements of a task are fulfilled. It took me a long time before I really understood how TDD works, because I haven’t had a good example how the process really works. That’s why I want to share it with you today.
My journey in TDD started with the following video where Robert C. Martin demonstrated the process:
Creating Basic Tests
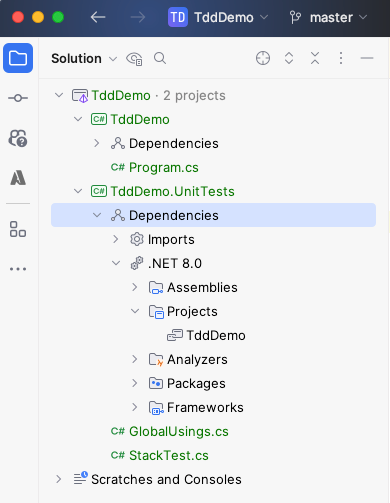
As I like the example of Uncle Bob to show TDD while developing a stack, I will take this as my example as well. My implementation will be in C# using xUnit as testing framework. If you are unfamiliar with xUnit, check out their documentation first. First, you have to ensure that you have an execution environment. That means, that you have an application project and a test project that has a reference to the application project. If the test can be executed the execution environment is working. To create such an environment I create a new solution with a console application and reference the console application project to the unit test project.
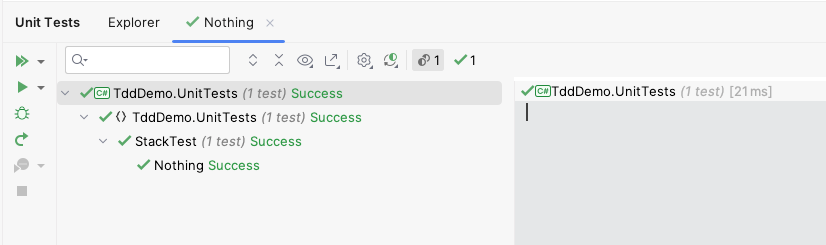
The StackTest C#-class contains a simple test that does nothing and just exists to verify if the test runner can be executed.
namespace TddDemo.UnitTests;

public class StackTest
{
    [Fact]
    public void Nothing()
    {
    }
}
Finally, you just need to execute the tests and see if they are working fine or if you see any problems occurring.
The second step in implementing TDD is to create a basic test that checks a specific functionality of your program. This test serves as a blueprint for the code you will write. By starting with a test, you have a clear understanding of what you want your code to accomplish. But where to start? There is a simple rule for that:
You write the test that forces you to write the code you already know you want to write.
Robert C. Martin alias “Uncle Bob”
So first we have to start with something as simple as writing a test that should create a stack.
    [Fact]
    public void CreateStack()
    {
        var myStack = new MyStack();
    }
Implementing Minimal Code
But now the IDE throws an error, saying that it could not resolve the symbol “MyStack”. That’s where the cycle begins. Remember the last article I wrote about TDD with the three phases “red”, “green” and “refactor”. Now, you maybe see why the first phase is called “red”: we write code until we get an error. That’s the moment where we have to fix it.
The goal is to write the simplest code that meets the requirements of the test. By focusing on passing the test, you ensure that your code is functioning correctly from the start. In this case it’s as easy as creating a new class called “MyStack” in the application project.
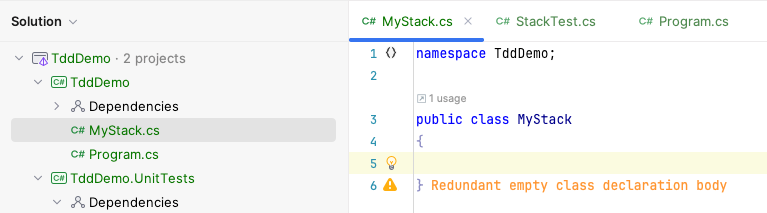
Now, when you switch back to your test case you see that the error is gone. If you run the test now, it is green. So our “green” phase is also finished.
Continuous Code Refactoring
After passing the test, the next step is continuous code refactoring. This involves improving the quality of your code without affecting its functionality. By refactoring your code regularly, you can eliminate any technical debt and ensure that your codebase remains clean and maintainable. I personally don’t like the name “MyStack” so I’ll rename the class to “Stack”. After renaming the class, run the test again to see if it still passes.
Continuing the Process
The given example was just the start in the TDD process and therefore a bit basic. Moreover, the test is not asserting anything. To give you a better insight I add some more logic to the code to show you how to continue the process. But let’s complete our first test first. In this case, it makes sense to check if the newly created Stack is empty. So let’s add that assertion to the test.
[Fact]
public void CreateStack()
{
var myStack = new Stack();
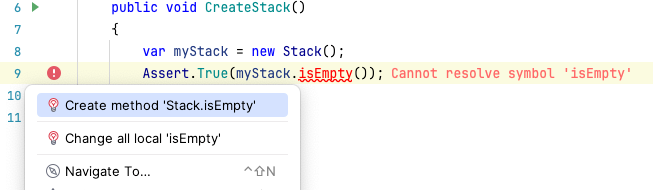
Assert.True(myStack.isEmpty());
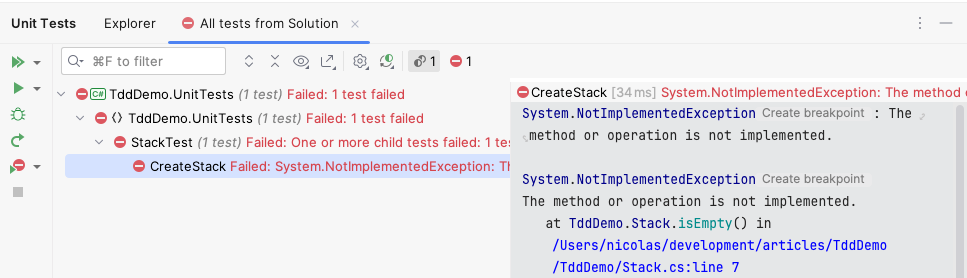
}The IDE shows an error again. Remember: now we are in the “red” phase again – fix the code. The solution in this case is to add the method. I let the IDE do the heavy work for me here. 😉
Run the test now and the test will be red. This step is crucial to see if our test really works or just always turns green.
To fix the issue, you have to write the simplest code possible to fulfill the test. In this case, it will be just returning true when the method get’s called. And the test runs like a charm.
“But why should I do it like that?” you may ask. With this method you see your test passes and fails and you need almost no time to test your test.
Now, it is refactoring time. First, I would rename the method to comply with naming conventions (from “isEmpty” to “IsEmpty”). Test again and afterwards renaming the test method (from “CreateStack” to “NewStackIsEmpty”).
To continue the process, I create a test to push something into the stack. I came this far before the IDE displayed an error:
    [Fact]
    public void PushInStack()
    {
        var myStack = new Stack();
        myStack.Push(5);
    }
Again, the method doesn’t exist. So let’s add it and run the test to see what’s going on.
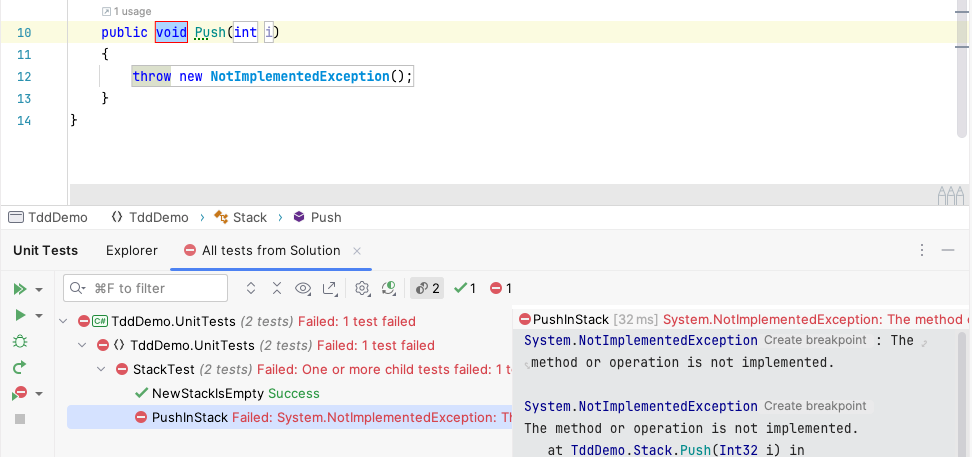
Remove the NotImplementedException and the test turns green – problem solved(?). In the refactoring, I rename the parameter “i” to “element”. It still works, no surprise so far.
Again, I need some Assertion. So, let’s assert that “myStack.IsEmpty()” returns false. And the test turns red again. Now we have to fix the problem.
One of the rules of test-driven-development is, that you engage as few brain cells as possible, because you’re going to need them later. Don’t do too much too fast.
Robert C. Martin alias “Uncle Bob”
So, to respect this rule let’s create a variable in the class called “isEmpty” that is initialized with “false” and will change to “true” when the method “Push” is called.
public class Stack
{
    private bool _isEmpty = true;

    public bool IsEmpty()
    {
        return _isEmpty;
    }

    public void Push(int element)
    {
        _isEmpty = false;
    }
}
In the refactoring, I would remove the duplicated initialization of “myStack” so the code for the test class looks like this:
public class StackTest
{
    private readonly Stack _myStack = new();

    [Fact]
    public void NewStackIsEmpty()
    {
        Assert.True(_myStack.IsEmpty());
    }

    [Fact]
    public void PushInStack()
    {
        _myStack.Push(5);
        Assert.False(_myStack.IsEmpty());
    }
}
The the process would continue like this.
Challenges, Reasons and Solutions
It looks strange at first. Why this tiny baby steps? Why not implementing the code first? If you would write your logic first, it would probably result in untestable code that is not modular. That would reduce the possible test coverage. The tiny steps are important to ensure that the tests are actually working. Else it could happen that a bug occurs even though the test is green which leads to unreliable tests. That’s a big thread you definitely want to avoid.
But there are advantages: using this technique reduces the amount of mental work you need to create code, because you just fulfill tests. Furthermore, you have lots of moments of success. Every green test is a success for itself. Do not get addicted. 😉 Finally, you can be certain that the code you created with TDD works as defined in the tests. It reduces stress and the amount of manual testing needed.
The more experience you gain in TDD, the faster you get. Maybe you decide to skip some setup steps, but you should try it out first.
TDD in Different Programming Languages
TDD is a language-agnostic approach that can be applied in almost any programming language. Whether you are working with JavaScript, Python, Java, or any other language, TDD can be implemented effectively. In this article I showed an example with C# and xUnit.
If you are looking to integrate TDD into your development process but unsure where to start, I am here to help. I can guide you through the process of implementing TDD and help you achieve code quality excellence.